Time has gone by and I can almost taste the end of summer. I’ve been doing many small tats lately and have to say, it’s challenging every time.
https://m.soundcloud.com/vauhti/vauhti-ghost
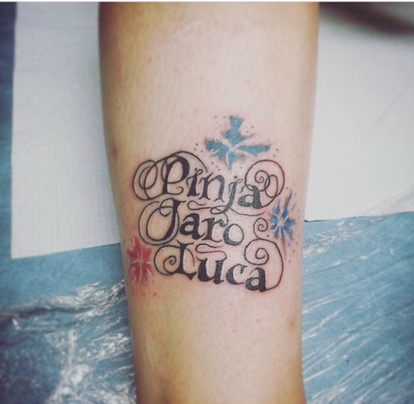
Names and birthstones
This dame got one spectacular idea: “Names and birthstones” Hell, I havent even heard about birthstones before and had to do some epic investigation stuff before could start even sketching…
Stencil
Stencil were easy to apply because the place was flat, no need for silkpaper.
“Stones” was only few straight lines and I made ’em with my shader.
Making of…
I was using 7Round liner and 9MgShader. Colors had to mix like she wanted.
What I learned…?
First of all, stencil for pictures like this should always make with “sharpies” and freehand style.
Decorating lines could also be much bigger giving the smoothness for the whole pic.
Perhaps next time I would even use a smaller needle for some special turns, 3Round liner could be nice, and tattoo would have more deep illusion.
Don’t forget to do “bloodline” like my mentor always says!
https://m.soundcloud.com/vauhti/vauhti-satumaahappo
Big feather
She wanted a blue feather to the hand. Really specific about what kind and what color.
Stencil
Had to use silkpaper so I could turn this right way from inside out.
Normal paper won’t work and stencil goes blurry easily, trust me..
Making of…
Stencil placed and ready to go. 7Round liner, 13Mg shader and 9Flat shader for tight spots. This time I made whole picture “bloodline” and blacks using (10% Black 90%H2O) mix.
It was really much more easier to start adding blacks and contrast when bloodline were down under.
Colors that I used were from Intenze this time. Outline black, peach, green and different tones of blue. Mixed up all colors with water and white.
Of course all the trimming and details I made with white using 7Round shader.

What I learned…?
The greatness of the bloodline!
No need to say how important it is to do shades and lines with enough light mixture and add the darker shades after.
Sure I knew this earlier but now I’m starting to realize what my teacher/mentor has always meant…
IF YOU WANT TO GO DARKER, GO LIGHTER FIRST…
Enough for this time, thanks for reading…
Sincerely yours: Jay

Leave a comment