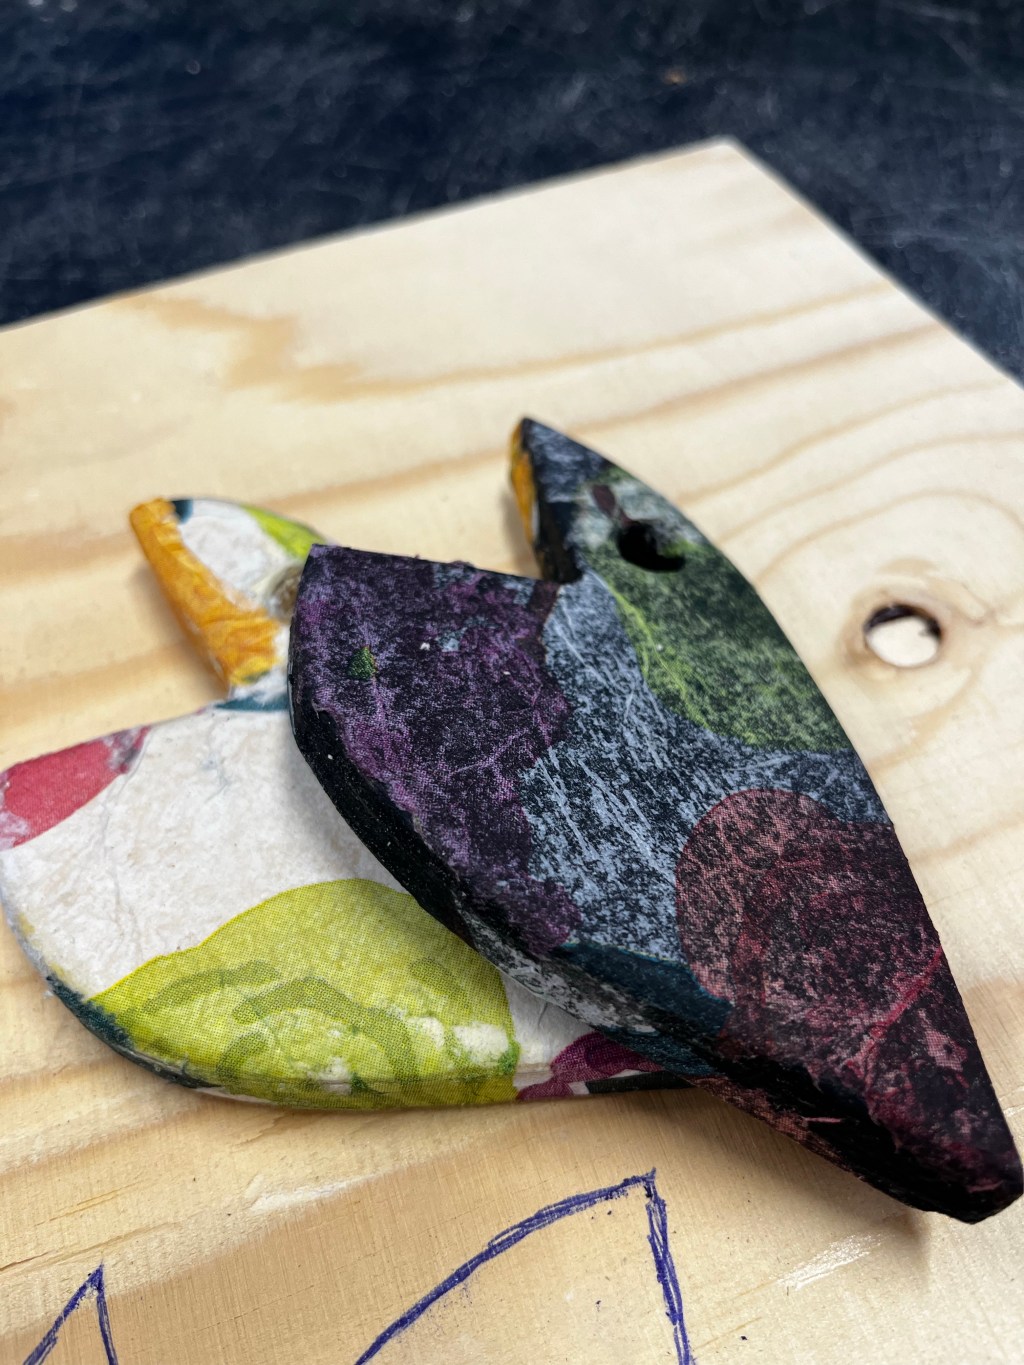
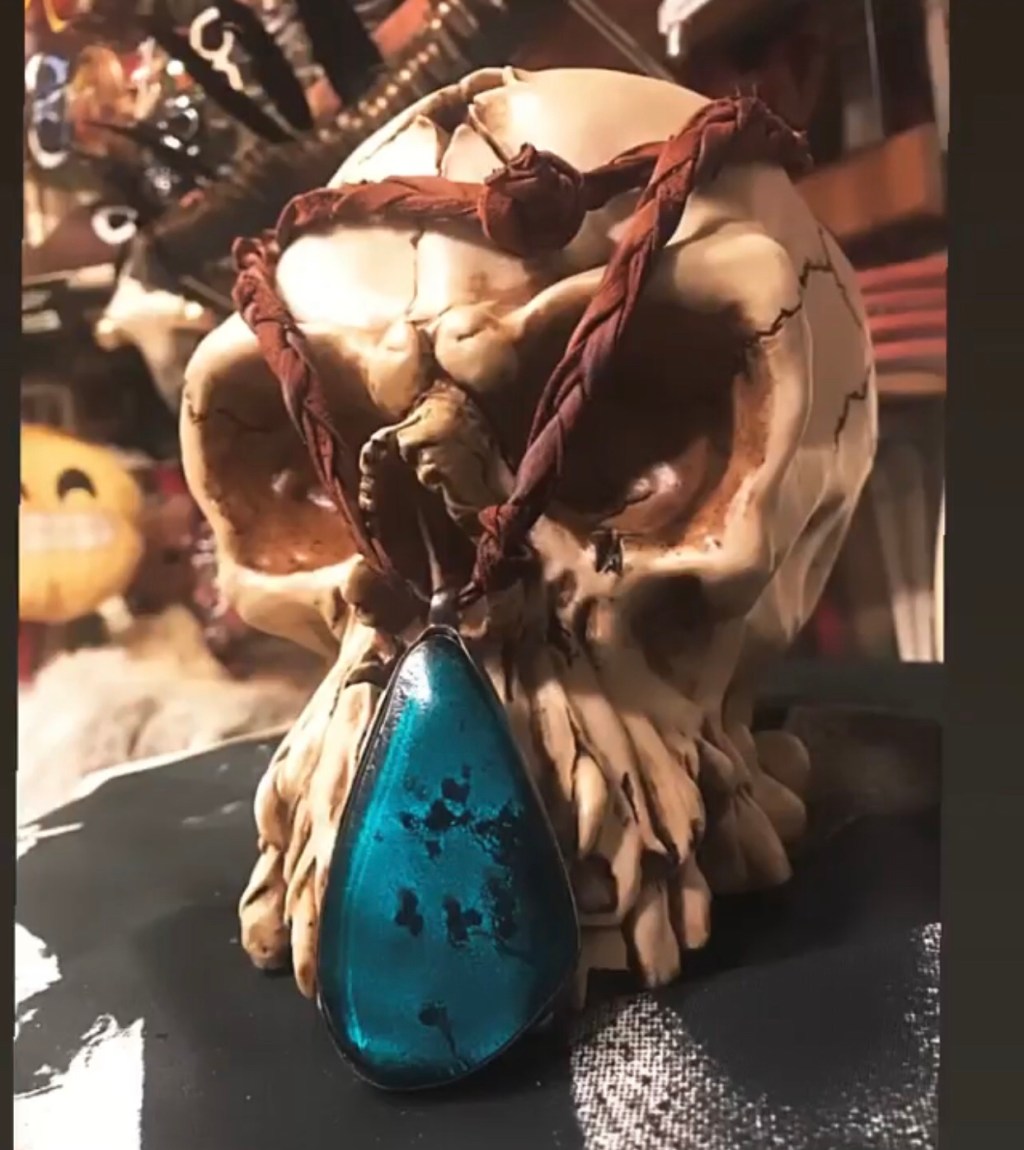
Spring collection of the wooden necklaces.

crafting, diy
My necklace collection is always made from recycled items.
Mostly items are found froom yard sale, recycling centers or second hand stores.

Favorite place to find items for jewelry is “scrap loot”
In recycling center, there is lots of stuff that you can collect and buy.
Scrap is spelled by the weight.
Normal price is 4€/kg

Local recycling center used to have many workers who take donations from the people.
Usually people donate stuff they don’t need.
Old curtains, belts, broken watches and stuff which you can’t sell.

The workers take everything what looks like it could be used in DIY-crafting and sell away.

Money they earned, went straight to the charity and those refugees in need of help.

Then Artists like myself buy those and turn it in to the art.

Here is few examples of necklaces I’ve made from the scrap items.
Wooden cherry
Wooden cherry-sand
Wooden ring
Wooden with pearls
Wooden with skull
Wooden sand-red
Transforming old scrap in to the something new and beautiful has always been one of my passions.
Making of the jewelry is interesting because you have to use what you have.
I don’t buy anything new for my jewelry or necklaces.

I just use what’s available at the moment.

Second hand stores has lost the purpose and they have turned in to the stores where everyone is selling crap in hope of making money.
That’s the main reason why crafters like me, don’t buy anymore from the secondhand stores.

Back in the day recycling was more ideal and people used secondhand stores to sell stuff they don’t need anymore, no one tried to get rich while doing it.
Perhaps economic situation these days has gone so bad, that everyone is just trying to make money out of everything.

Recently I had bad news at recycling center, they don’t have that DIY-table anymore and they just throw everything in to the garbage.

Sadly crafters like myself don’t have many places left where to find these “unwanted” items.

There ain’t no more those people who needs so called recovery work, which recycling center offered before for all those people who don’t have anyplace to work.

This is wrong way where we are going, if we want to save the planet.

Yours. ”DIY-Crafter” Jay

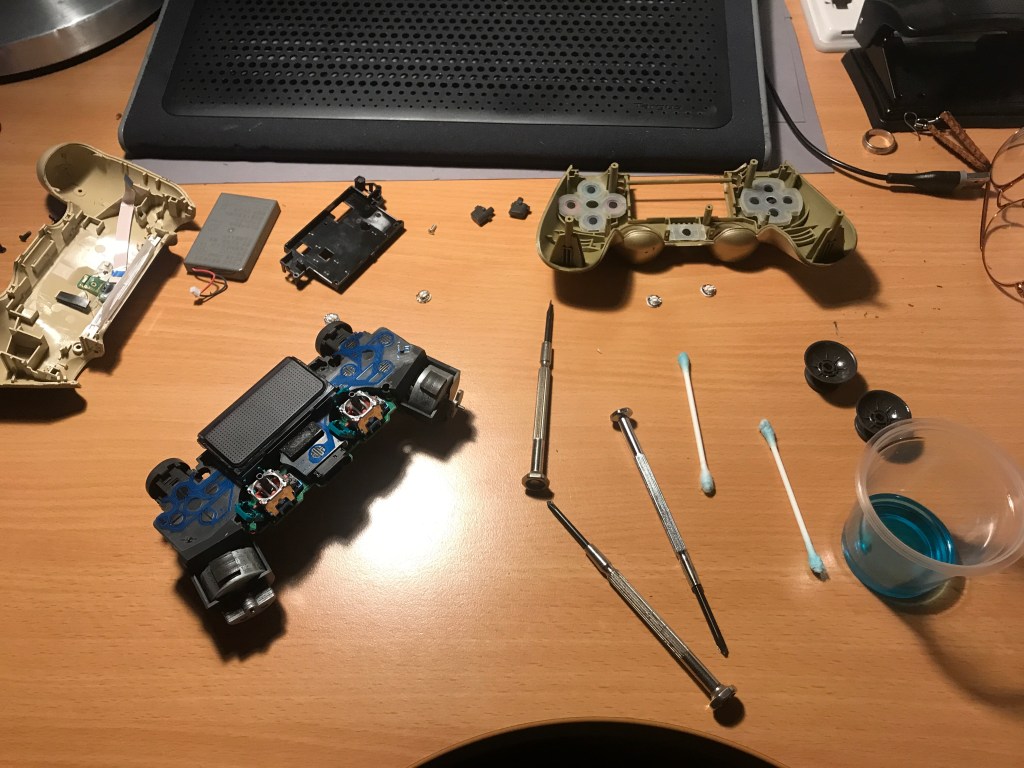
DIY Project: “Drifting PS4-Controller”

diy
There was a surprisingly common problem with my PS4 DualShock controller.
Left stick (L3) was drifting up all the time. Quick search from the YouTube and I did found “how to” video.

It’s great how many ch people do these instruction videos for the dummies like myself.
Timelapse of action

Just follow the instructions and it’s done, right?

Oh my sweet Jesus how much tiny parts controller has!
I had no idea how many things can go wrong in the process.

Tools used:
- Tiny Screwdriver
- Alcohol for cleaning (and for the cleaner)
- few cotton swabs
- device with YouTube app
- paper towels


“Just follow the steps”

Okay, that’s not true in my case.
I mean, I really tried hard. I did my best, but like everything in life, it’s not so easy as it looks.
Timelapse before mental breakdown
After three epic failure I was ready to give up.
I had ruined the whole controller, it’s not working at all.

Perhaps the strength that I used after the second attempt was too much.

I’m quite sure that in some point I was even using my teeth in anger.

Smashing the controller in to the corner of the table didn’t help at all.

Note to myself:
If you get aggravated in the process, it would be good idea to breathe and calm down. You know, do Yoga or something nerve calming.

Normally smashing objects during the fixing operation rarely helps, sure the remote control of TV is an exception. Smashing the shit out of remote always helps.
SOLUTION
In the end of the video, there was missing the part where you have to walk in to your local game dealer and buy a new controller.
Don’t you worry, I did recycle the old controller, or what was left of it.

After a time when game dealer clerk stopped laughing hysterically, he sold me the new DualShock and gave me an advice:

DO NOT BITE YOUR CONTROLLER IN ANGER!

Great advice, perhaps this controller stays in shape for a while and I can enjoy my gaming sessions.

Here is my “protip” for all you little DIY-project lovers out there:

“If you suck-ass in projects like this, don’t do it!”

Looks like I have a thumb in the middle of my hand in fixing like these.
Next time I will happily pay the game dealer, so his actual controller mechanic can fix my controller.

It ain’t cheap, it’s 19.90€ but that WAY cheaper than my way.

Yours. “Controller freak” Jay